You are using an out of date browser. It may not display this or other websites correctly.
You should upgrade or use an alternative browser.
You should upgrade or use an alternative browser.
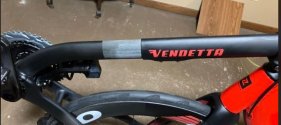
extending slider to fit reveals bad finish; remedy?
- Thread starter Robert Volk
- Start date
Andrew Wilson
Guru
Bummer.
Is the C/F painted in some way up to that point ? If not, I would try automotive scratch remover/ polishing compound and see if you can bring the gloss back. If not, then all you can do is cover it up some how, perhaps mask off and spray with a matt or satin black ??
Is the C/F painted in some way up to that point ? If not, I would try automotive scratch remover/ polishing compound and see if you can bring the gloss back. If not, then all you can do is cover it up some how, perhaps mask off and spray with a matt or satin black ??
Robert Volk
Member
yes, prolly have to paint it i suppose, are all v20c's like that or am I just luckyBummer.
Is the C/F painted in some way up to that point ? If not, I would try automotive scratch remover/ polishing compound and see if you can bring the gloss back. If not, then all you can do is cover it up some how, perhaps mask off and spray with a matt or satin black ??
piston9
Member
Still building mine - it's similar - the 'gloss finish' stops at the minimum adjustable point.
My educated guess is the paint would 'scratch' with adjustability (or affect the sliding motion in some way), so this is the solution to have bare carbon there. Maybe a super light grit wet sand will bring it nice - Interested to see what others who have owned longer have done.
My educated guess is the paint would 'scratch' with adjustability (or affect the sliding motion in some way), so this is the solution to have bare carbon there. Maybe a super light grit wet sand will bring it nice - Interested to see what others who have owned longer have done.
Andrew Wilson
Guru
As OCD as I am , it would upset me too. Keep us all posted as to what you do.
chicorider
Zen MBB Master
Mine is the same, but as I am short, the unfinished section is covered up. The finish is a matte clearcoat. I know this because I had an issue with my slider, so Robert sent me a pre-production replacement (because he's awesome like that!) that has a glossy clearcoat finish, back when they were trying to decide whether to go matte or glossy. It's an interesting look. I kinda like it.
Anyway, if I were in your cycling cleats I would give the unfinished section a light fine grit sanding, tape off whatever needs taping off, and spray it with a good matte clearcoat. You'll probably get a close enough match that the casual observer won't notice.
Anyway, if I were in your cycling cleats I would give the unfinished section a light fine grit sanding, tape off whatever needs taping off, and spray it with a good matte clearcoat. You'll probably get a close enough match that the casual observer won't notice.
Andrew Wilson
Guru
Looks like you have your answer.Anyway, if I were in your cycling cleats I would give the unfinished section a light fine grit sanding, tape off whatever needs taping off, and spray it with a good matte clearcoat. You'll probably get a close enough match that the casual observer won't notice.
Robert Volk
Member
Mine is the same way. Could maybe put some black reflective tape on there, and serve two purposes. But you would probably have to remove it if you wanted to ever shorten the boom
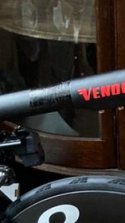
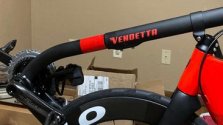
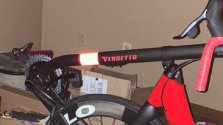
SO first tried some magic black marker, looked like crap up close , and didn't really blend. I thought if cant get good match why not just go red. Went to the hardware store and bought some red reflective tape for $5. Looks pretty cool imo
billyk
Guru
Nice!Went to the hardware store and bought some red reflective tape for $5.
I found some orange tape that matches my 2018 Q45, and decorate several parts with it. Stripes along the fenders and etc. Also protects the paint where it might rub (lock mount).
Plus, when you're parked with a bunch of other V's, you'll immediately be able to pick yours out of the crowd ...
Mathew Fy
GRU
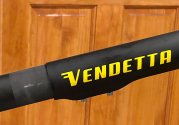
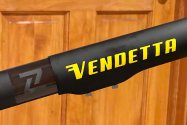
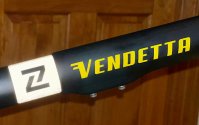
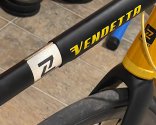
After tweaking the fit of my curved slider, I finally put on the Cruzbike stickers on.
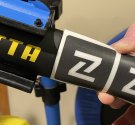
Shown below are: bare boom, sticker - no flash, sticker - with flash, sticker - ceiling light over shoulder.
Shown below are: bare boom, sticker - no flash, sticker - with flash, sticker - ceiling light over shoulder.
Attachments
Randyc3
Well-Known Member
Hi, A variant of the red reflective tape. I used carbon-fiber-automotive-vinyl on a storage box. A quote from work "if you can't hide it, point to it."SO first tried some magic black marker, looked like crap up close , and didn't really blend. I thought if cant get good match why not just go red. Went to the hardware store and bought some red reflective tape for $5. Looks pretty cool imoThen I turned off all the lights and took a photo with the flash on. The slider looks like it is glowing REDHOT! Which looks really cool ! Thanks for the ideas!
View attachment 13932View attachment 13933View attachment 13934
https://vvividshop.com/collections/carbon-fiber-automotive-vinyls
Cheers.
Bill Wightman
Well-Known Member
I have the older aluminum frame but am doing carbon fiber layup for a V20 fairing. As was mentioned earlier you can keep the diameter dimensions of the matte finish but polish the matte out a bit with polishing cut and final polish compounds. You would have to mask the "good" section and stop polishing when the surface looks similar enough to the forward exposed portion. I would first try this out near the end of the tube for a practice run. It appears the V20c no longer depends on a friction grip for adjustment so changing the surface characteristics is not a safety issue.
IMO the black, red, or white reflective tape is the best, easiest, and lowest risk idea as stated earlier.
IMO the black, red, or white reflective tape is the best, easiest, and lowest risk idea as stated earlier.
Bill Wightman
Well-Known Member
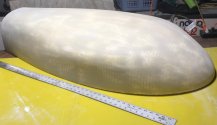
I will probably open a new topic after I get some successful test rides in. Not too far along. Starting the shell this week after some Bondo-style smoothing of the EPS plug on one side. Will take many months for results. The fairing is just over the front section and back to the low spot in the seat. It is a clamshell approach, left and right. Fits a 165mm crank and I am using 17.5" chainstay. After I get the shell built I will temp mount it to the bike and start the trim and adjustment phase. Will make a cut parallel with the fork axis and put in some spring-loaded hinges loading against frame so I still have steering freedom.Cool! Please share the V20 fairing info (build process and/or when complete) at your convenience.
Last edited:
Randyc3
Well-Known Member
Nice looking mold and thanks for the description.I will probably open a new topic after I get some successful test rides in. Not too far along. Starting the shell this week after some Bondo-style smoothing of the EPS plug on one side. Will take many months for results. The fairing is just over the front section and back to the low spot in the seat. It is a clamshell approach, left and right. Fits a 165mm crank and I am using 17.5" chainstay. After I get the shell built I will temp mount it to the bike and start the trim and adjustment phase. Will make a cut parallel with the fork axis and put in some spring-loaded hinges loading against frame so I still have steering freedom.
View attachment 14323

