Rear derailleur shifting issues

VeloLEV

Member
I finally tracked down the culprit in a maddening issue causing trouble shifting the rear derailleur. It was acting like a bent derailleur hanger, where it could be adjusted correctly for 4 or more gears in a row, but the rest would either ride up or down like too much or too little tension. I noticed the original derailleur hanger was misaligned when I finally figured out a great way to work on the bike. I clamp it on the TFT tube below the headset, and have a hook in the ceiling I hang the rear wheel on. This puts the front workings in the exact same position I use everyday at work on upright bicycles. So I used the DAG and bent the hanger. Issue solved for about a 40 mile ride, then it came back. Now there was about .5mm of play in the hanger/fork/carbostay sandwich, changing the angle of the derailleur throughout the shifting range. Final debug involved replacing the hanger with the extra one included with the bike.

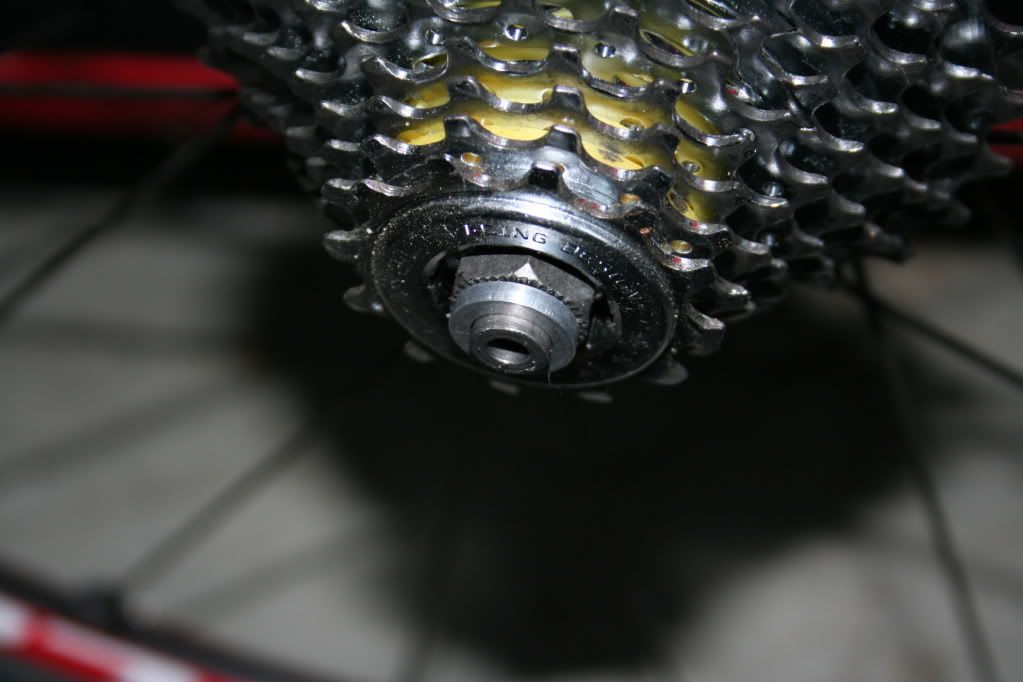
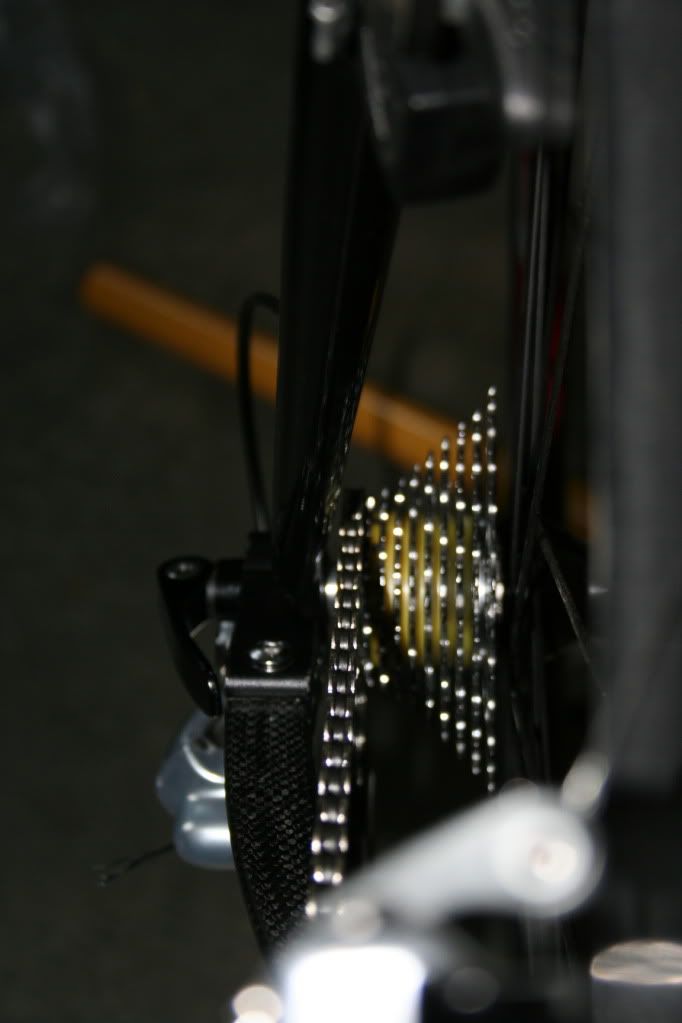
FINALLY! I found the problem, though I cannot immediately solve it. The mounting surface of the SRAM Red derailleur is about 2.5 to 3mm larger in diameter than the cutout on the hanger. I have to grind it out I guess, or ask Cruzbike to begin manufacturing a compatible hanger. In this photo you can see the circular mark created by the larger diameter derailleur:

der_hanger.jpg
 

Mark B

Zen MBB Master
Just for giggles, I went out and pulled my derailleur off. I have a similar mark on my hangar, BUT... My derailleur has a e-clip that holds the mechanism together and THAT shims it out to where it just tightens up against that shoulder. I would guess yours is similar, Lev.

Mark
 

Doug Burton

Zen MBB Master
Hi Lev,

Several folks have had issues with chain/fork clearance (this is most common with Campy parts, but I have just seen my first one on Shimano...)

I've been working on a solution and we now have enough mileage on a test bike where it's worth bringing up here. The solution should also fix the issue with the derailleur/hanger interface.

The solution involves placing a 2 or 3mm spacer on the drive-side axle, and machining the derailleur hanger mounting face to restore the derailleur's position over the cassette.

IMG_3096.jpg


IMG_3100.jpg


IMG_3098.jpg


IMG_3095.jpg


IMG_3104.jpg


We have some professionally-remade hangers on the way and they should arrive soon. We'll let everyone know when they are available. An upgrade kit consisting of the hanger and a set of spacers is planned.

This will also solve the chain clearance issues that people with very short x-seams have occasionally experienced.

Lemme know if you have questions.

Best,

Doug
 

VeloLEV

Member
Thanks Doug for your efforts helping us resolve these issues. :D again! :D
I imagine it would be acceptable to attempt cutitng my own hanger(s) after seeing the method you used. I also suspect the solution of a spacer would create unacceptable axle penetration in the dropout. :shock: A longer axle should be used to be safe.

Hey Mark I checked mine and compared the two at work today, new ones that had never been used. Indeed overall diameter is the same, but the SRAM B-tension collar is even with the clip, unlike Shimano . After inspecting the twenty or so different derailleur hangers we have in stock there are none that have any interference of this type, since they all align parallel to the outside of the dropout.

In my opinion, the solution to both issues would be to eliminate the unusual and ineffective sandwiched derailleur hanger, mod the fork to accept a common road hanger and extend a section of the right fork dropout parallel to the wheel for about 5cm. Imagine removing your drive wheel and NOT having the derailleur and chain fly out and get all tangled! :eek:

lev
 

Doug Burton

Zen MBB Master
"I also suspect the solution of a spacer would create unacceptable axle penetration in the dropout. A longer axle should be used to be safe." - Lev

I considered this. The Master, Sheldon Brown, said this:

"Axle Length
Typical quick-release axles are 11 or 12 mm longer than the spacing of the hub locknuts. This gives 5.5-6 mm of axle protrusion on each side. You don't actually need nearly this much, so for respacing hubs to wider spacing, if you're not adding more than, say, 5-6 mm of spacers, you don't need a new axle. As long as you have 2 or 3 mm sticking out on each side, that's plenty. One of my own bikes is set up with the axle cut off flush with the locknuts, and even this is no problem in use, though it is slightly trickier to align the wheel when installing it."

http://sheldonbrown.com/frame-spacing.html

The actual job of holding the wheel in place is done by the face-to-face pressure applied by the quick release or axle nut at the drop-out/lock nut interface. If the axle is actually carrying the load from the fork, the QR is not tight enough and the dropout will be abraded. As always, it's critical to tighten the QR properly.

" Imagine removing your drive wheel and NOT having the derailleur and chain fly out and get all tangled! "

Install the QR with the release handle on the drive side instead of the non-drive side. When you have to remove the front wheel, leave the QR in far enough to support the derailleur hanger in the dropout.
 

Mark B

Zen MBB Master
Hardtailcruzer wrote: Install the QR with the release handle on the drive side instead of the non-drive side. When you have to remove the front wheel, leave the QR in far enough to support the derailleur hanger in the dropout.

+1.... This is what I do. Extra points for thinking outside the box!

Mark
 

Gromit

Guru
Doug

Shouldn't the spacer washer have a knurled surface on the dropout side to prevent slippage? :?
The side of the spacer washer facing the hub is okay plain as it faces the knurling on the other component of course. :)
 

Doug Burton

Zen MBB Master
Gromit wrote: Doug

Shouldn't the spacer washer have a knurled surface on the dropout side to prevent slippage? :?
The side of the spacer washer facing the hub is okay plain as it faces the knurling on the other component of course. :)

The purpose of Knurling is to reduce the contact area between two mating surfaces, to facilitate removal or adjustment.

A toothed washer penetrates the mating surface. Dunno where to get a toothed or serrated spacer at this time.

Proper QR adjustment should make this unnecessary...
 

buyagain

Well-Known Member
To Doug
No fair using all that fancy milling, and cutting bit stuff. Use a hacksaw next time so I can follow the process. Kinda reminds me of the Norm and his "New Yankee workshop". If you know what I mean. LOL

Great close up photos too.

Bob C
 

Doug Burton

Zen MBB Master
Hi Bob,

I wish I could do with metal what Norm does with wood.

The naughty secret is most of the work gets done with a Harbor Freight belt sander - you gotta get one!

3WHELZ - Jim Parker has a limited supply of a retrofit kit I designed for folks having this issue. If you contact him through the website, he can provide you the parts. Please, anyone not having the issue, please don't request an adapter kit; it will interfere with your shifting if you mount it when it's not needed.

Best,

Doug
 

3WHELZ

Guru
Re: UPDATE -- Rear derailleur shifting issues

Doug - thank you. Message sent to Jim. I am looking forward to using that smallest cog on my Campy cassette. ;)

Problem solved!!

Doug thank you for the design, and to Jim for sending the kit out to me. The 3mm spacer along with the new hanger did the trick.

I think I have finally mastered this machine. Last week I graduated to clipless pedals, Ti SpeedPlay Frogs. What a performance improvement to include starts. I can now start on an incline without much trouble.

Thanks once again!!!
 
Top