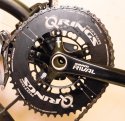
Q ring upgrade - Ahhhhhhhhhhhhh......

ReklinedRider

Zen MBB Master
Looks correct. Sounds correct.

So you will be using the bolt closest to the dérailleur as you OCP Bolt.

Good, that's a relief. Thanks for taking a look at it.

And yes the bolt closest to the dérailleur in that pic will be my OCP bolt.

Here's another question if you can stand more on this topic: what is the actual use of the other OCP settings? If I wanted to tweak towards easier acceleration/less of a masher position, would i need to rotate the ring so that the 3 hole is at the bolt hole which is currently occupied by the 2 hole? Is that what Rotor means by "rotate the chainring to a higher OCP number"-- putting the 3 at "my OCP bolt" instead of the 2?

Could i just rotate the ring a bit counterclockwise and accomplish the same thing? Or is there magic in rotating clear around to the higher marked hole?

Or conversely to shift towards higher top speed.... Move the 1 hole to the OCP bolt, or just rotate the ring further clockwise?
I know that's down the road if ever, just trying to get some understanding of the principle(s) behind these rings so I can think it through and not just be following a rote procedure.

Seeing battleaxe0's setup is encouraging too.
 

ReklinedRider

Zen MBB Master
So here's the difference between the JT method and Rotor's method: before and after shots of the crank at 70 degrees back from the dead spot. Tho to be up to date his amended method in an earlier post says rotate back only 60 degrees, which would result in something quite similar to the 'after' pic.
Before:image.jpg

After:
image.jpg
 

ratz

Wielder of the Rubber Mallet
Here's another question if you can stand more on this topic: what is the actual use of the other OCP settings? If I wanted to tweak towards easier acceleration/less of a masher position, would i need to rotate the ring so that the 3 hole is at the bolt hole which is currently occupied by the 2 hole? Is that what Rotor means by "rotate the chainring to a higher OCP number"-- putting the 3 at "my OCP bolt" instead of the 2?

Each numbered hole; is one half position from the the neighbor numbers. So 1, 3, 5 are a full hole of change from each other. While 1,2 are ½ hole of rotation hence the reason you have to flip the ring to go from 1 to 2.

For mashing put #1 on the OCP bolt.; for spinning put #4 on the OCP bolt. In your case these will be the number #1 and #4 that you counted out and marked by hand since you aren't using the factory dots due to the lower height of you BB. This is 100% normal in your case and expected.

If you are like the rest of us you will probably find that #5 is unrideable on a CB; it's just tool late in the acceleration curve to be comfortable; and you'll get pedal steer you won't like.

Low numbers make the ring "Bigger", "Earlier" in the power stroke good for mashers and give more top end speed at cadences that rang 60-80rpm. This a more leverage position.

Big numbers make the ring "Bigger", "later" in the power stroke good for spinners. It gives you more acceleration of the pedal and uses said accelerated pedal momentum to sling shot the ring through the power phase of the ring. This is good for spinners and people that range 80-100 rpm pedaling.
 

ratz

Wielder of the Rubber Mallet
So here's the difference between the JT method and Rotor's method: before and after shots of the crank at 70 degrees back from the dead spot. Tho to be up to date his amended method in an earlier post says rotate back only 60 degrees, which would result in something quite similar to the 'after' pic.

60-70degree is your max power zone so look at the size if the ring diameter during that phase and you can your max diameter is ending just as you finish the power stroke in picture 2 that is a good thing
 

ratz

Wielder of the Rubber Mallet
ok If that is your dead spot then you have a slightly different rotation than the vendetta's earlier in the thread; similar to Kline. This is a function of the height of your BB.

Working from eyeball I have marked you likely 1,2,3,4,5 holes in red.

If that is correct then in that crank position; Move the red #4 or #2 to bolt indicated by the arrow. If #4 in on the arrow bolt then the Factory white line from the factory printed white "5" should line up with the Tooth that is just disengaging from the chain below the crank arm. if red #2 it should be the factory line #3 or #1.

This should look roughly like Gary's (bent aero's) picture earlier in the thread just using the RED numbers I've marked.

battlering.png
 
ok If that is your dead spot then you have a slightly different rotation than the vendetta's earlier in the thread; similar to Kline. This is a function of the height of your BB.

Working from eyeball I have marked you likely 1,2,3,4,5 holes in red.

If that is correct then in that crank position; Move the red #4 or #2 to bolt indicated by the arrow. If #4 in on the arrow bolt then the Factory white line from the factory printed white "5" should line up with the Tooth that is just disengaging from the chain below the crank arm. if red #2 it should be the factory line #3 or #1.

This should look roughly like Gary's (bent aero's) picture earlier in the thread just using the RED numbers I've marked.

View attachment 580
Thanks!
 

Jeremy S

Dude
At dead spot on OCP#3 first tooth to disengage is #1.
Going through my Q ring setup again, Bob, I've been curious about your mention of using the first tooth to disengage as a reference, because the Rotor instructions only mention using the first tooth to engage. The two aren't guaranteed to be opposite each other on the chainring because changing the chain length or RD cage length will change the first tooth to disengage, but not the first tooth to engage. And the radius of the chainring at the first tooth to engage should determine the angle the chain pulls at, while the radius at the first tooth to disengage does not seem significant.

Anyway here's my attempt to redo the setup at Rotor's suggested starting point, after putting on shorter cranks:
IMG_0144.jpg

Assuming I actually have OCP #2 here, I'm trying to figure out what adjustment options I have available. It looks like I can get OCP #1 by rotating the chainring around so the bolt currently lining up with #4 instead lines up with #3. But it doesn't like like OCP #3 is even available given the gaps between the bolt holes.
 

ratz

Wielder of the Rubber Mallet
That is interesting your 50t doesn't have a mark for ocp5. I didn't know that. Very interesting how your dead gaps are in different places.

Engage is preferred as you noted. I put the chain in the middle rear gear on mine and engage and disengage are mirrored images. Perhaps Gary's was a unique case where disengage was visually equal perhaps due to his boom setting same as mind. However I do prefer the engage side and that is what I personally use in adherence with rotors guide.

Is that you crank at the dead spot? I know you added an extension but I don't remember how tall you are ( I seem to recal 5'10" ish with a 39-41xsean ????) if So that seems low to me as in past the dead spot.

If that is your dead spot then you would indeed be in ocp2 and setup correctly per rotors instructions. From there you can swap in 1,3 and 4 onto that bolt that 2 is currently on to see how they feel. 1 should in theory be mash tastic and 4 should be spinny. And 3 might be just odd feeling.
 

Jeremy S

Dude
that you crank at the dead spot? I know you added an extension but I don't remember how tall you are ( I seem to recal 5'10" ish with a 39-41xsean ????) if So that seems low to me as in past the dead spot.
I think it's my dead spot (it's a bit hard to be sure), about 5'10" with 45" x-seam, 50mm extension, 165mm cranks. I'm probably holding the camera off-angle here, so many factors involved in judging this...

If that is your dead spot then you would indeed be in ocp2 and setup correctly per rotors instructions. From there you can swap in 1,3 and 4 onto that bolt that 2 is currently on to see how they feel. 1 should in theory be mash tastic and 4 should be spinny. And 3 might be just odd feeling.
The thing is, there is no bolt lined up with #2, the bolt is lined up right next to it at #4. So I think I have OCP #1 easily available, but I'm not sure I can hit #3, #4, or even #5 given where the bolt holes are. The next available hole in that direction is way over.

Thanks for the response, happy 4th.
 
Last edited:

ratz

Wielder of the Rubber Mallet
Ah I see that now 4 is on the bolt. Didn't load the Zoom image on the iPhone. I do have an idea. I'll annotate the photo tomorrow after the fireworks.

You can double check your dead spot. Put on street shoes put heel on pedal. Lock out leg, that should be the dead spot or good enough for this adjustment.
 

ratz

Wielder of the Rubber Mallet
Jeremy,

I wouldn't change anything if spinning ease was your goal.

Based on you confirmed height and x-seam my guess is that you setup correctly and running OCP4 now with it's net effect on improved spinning.

If I was setting it up initially I would have thought/estimated your dead spot probably a little bit counter clockwise of you photo. If that was correct then moving the bolt from 4 to 2 would have produced a setup with the standard starting point of OCP2; at the dead spot with 1 as the first engaging tooth.

Looks good to me; and that's the same bolt I prefer.

IMG_0144.jpg
 

Robert Holler

Administrator
Staff member
I am so glad you all are on here helping. That looks like a good position on that Q ring to me as well.

Robert
 

Jeremy S

Dude
If I was setting it up initially I would have thought/estimated your dead spot probably a little bit counter clockwise of you photo.
There could be a couple of factors here: the camera looks to be a bit off angle (the FD should be a bit counterclockwise too) and the rear wheel is elevated a tad because it's on a stand. I will definitely try it out as pictured and then try out bolt #2 for comparison.
 

ratz

Wielder of the Rubber Mallet
There could be a couple of factors here: the camera looks to be a bit off angle (the FD should be a bit counterclockwise too) and the rear wheel is elevated a tad because it's on a stand.
That would explain it and makes sense.
 

Rick Youngblood

CarbonCraft Master

I thought as did Marc that this was a very interesting read.

********Below is from the BROL thread - permission given by seemark2 *********

This was posted by me, 3/7/'15 on BROL: (While still on the 1st 1000 mi. MBB learning curve)

http://www.bentrideronline.com/messa...96844#poststop

I have tested extensively the following on my M5 CHR:
1) Rotorcrank RS4X cranks
2) Rotor Q-rings
3) Rotor QXL rings
4) Doval rings
5) Osymentric rings

My criteria was solely which gave the highest speed average with the least exhaustion. Not too scientific, but that was my only concern.

Note: We don't have a lot of rolling hills in South Florida, but the course includes 4 large hwy overpasses, so gradients were included. I regularly ride this course twice a week with a group of roadies.

Note: I am not a "masher" with big powerful legs. I am a "spinner" and keep a higher cadence.
Rankings:
1) Rotorcrank RS4X - gave the best overall speed/performance ratio. Note: The cranks were blueprinted for max efficiency via Airwolf's friction reduction process.
2) Rotor Q-rings- About 90% as efficient as the RS4X, good for a normal/to higher cadence
3) Doval rings- Interestingly no "dead spot" as with the Osymetrics, but not index-able either, but overall gave good performance, almost as good as the Q-rings
4) Rotor QXL- Definitely for mashers or very powerful riders. Tended to be suited for lower cadences but definitely required more effort, I was more exhausted at the end of the ride. Note: Might be good for a MBB (moving bottom bracket) recumbent. I will give these a try again once I'm better on my Vendetta.
5) Osymetrics- The worst of the bunch. They do increase power somewhat, but exaggerate the dead spot, even more than just a round ring. There are riders who have gotten used to them but I found them inferior to any of the other four above

10/10/'15

Having ridden my Vendetta now about the same amount of time as my M5 CHR, I thought I'd post my findings on regular q-rings vs QXL q-rings. (The QXL rings have a more extreme ovalization than the regular ones.) Setting on both types of rings for the test is on the regulation point 2.

The course and conditions are exactly the same as was previously written, my conditioning has remained consistent for the last 8 yrs or so, for clarification purposes.

Note: Rotorcranks cannot be installed on a Vendetta, due to the bottom bracket mounts. So only the Rotor rings have been tested on the V. Doval rings are not indexable, so were not used on this test. The Osymetrics are also not indexable and gave poor performance on the last two rear wheel dr recumbents I tried them on, (Metabike and CHR), so I didn't bother with them either.

Initially I used round rings the 1st 500 miles or so while learning on the V, as I knew I did not have a baseline nor did I ride the M5 since riding the V, so my autonomic responses wouldn't get confused.

At 500 miles I did not feel I could power down hard yet, but had been riding in a paceline for a couple hundered miles.

Switching to the regular q-rings at 500 mi gave immediate smoothness, not so much as usual on the small (44t) crankring as on a rwd, but the large ring (53t) felt real good, better than when on the rear wheel dr. (I have used a 44/53 combo for the last few years, I found it quite suitable for the predominately flat roads we have here.)

For the next 1000 mi I found myself using the 53t gear as much as possible, the compensation is greater the larger the diameter I think. This is opposite of what I used on the CHR, I rarely used the large ring, only going downhills. (I can sprint up to 31 mph in the 44t ring before cadence gets too high) (Running 700c wheels, 11/28 rear cassette on both bikes)

That got me wondering if the Vendetta was just that much more efficient? To me it feels more efficient, mechanically or ergonomically, or maybe both, still not sure and the debate would go on forever no doubt.

I know the 44t QXL ring on the M5 required too much effort, maybe it would be the ticket on the V? So, I installed it about 300 mi ago. Immediately it was WOW! More responsive, smoother, AND more power! Much easier to maintain a higher cadence with less effort. My average speed is up about 1mph, I don't get winded as much going uphill, my legs are not as sore after a ride, nor do they take as long to recuperate. Win, win, and Win! It feels like a new bike!

Anyway, I thought I would share this with you all. Not trying to convince anyone of anything thing, and as always, your mileage my vary.

If anyone feels inclined to post this on the Cruzbike forum please, feel free, I can't log on anymore since they changed it without changing my email address.
 
Top