Quickr 3.0 - not quite AI yet

ratz

Wielder of the Rubber Mallet
I decided I needed some building before the big build. So I spent some time with some of the newer technology to see which of my skills needed to be improved and what new ones I needed.

Here's the Parade of Parts. It only takes a few to make a big impact.


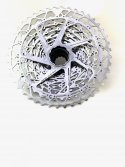
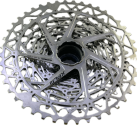
SRAM XPLR 10x44T XDR Driver Cassette
IMG_7602.png

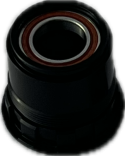
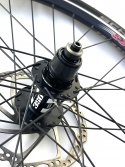
XDR Free hub from DTSwiss
Subject.png


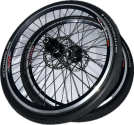
20" A23 Aluminum Go Fast Wheel with gravel tires.
Subject.png


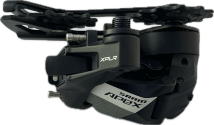
SRAM ASX XPLR Shifter

Subject.png

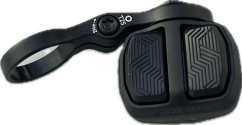
Shifter control pods
Subject.png
 
Last edited:

ratz

Wielder of the Rubber Mallet
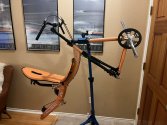
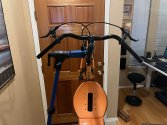
And of course, we need a patient; enter a low-mileage Quest20

IMG_0596.jpeg

This beauty is full sock; original parts right down to the dual drive and pedals.


IMG_0597.jpegIMG_0598.jpeg
 
Last edited:

ratz

Wielder of the Rubber Mallet
First, let's get the wheels off and set them aside

IMG_0599.jpeg
 
Last edited:

ratz

Wielder of the Rubber Mallet
And let's remove the shifter and all that unnecessary wire that makes it hard to adjust the bike for different riders frequently.

IMG_0600.jpegIMG_0601.jpeg
 

ratz

Wielder of the Rubber Mallet
Ok, and then the easiest thing we are going to do that most people cringe about until they do it once..... Change the free hub.
In this case, we will remove the hyperglide hub from the DTSwiss350 and add an XDR hub to put the 12-speed cassette on.

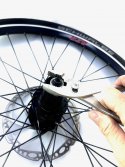
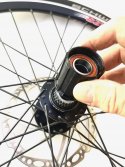
Gently remove the QuickRelease end-cap/dust-cover to expose the bearings and spindle. I'm using a pliers with light pressure if you are worried about scratching things and rubber-coated grabber will do; the force required is very little.

IMG_0577.jpegIMG_0578.jpeg

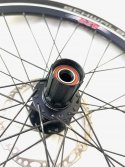
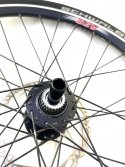
Remove the hub and expose the spindle and teeth of the drive gears

IMG_0579.jpegIMG_0580.jpeg


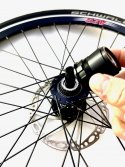
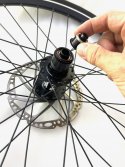
After inspecting for wear, slide the new XDR FreeHub on to the spindle and rotate until the pawls (Those things that make the clicking sound when you coast) line up, and the hub drops down into place and then install the new dust cover


IMG_0581.jpegIMG_0582.jpeg


And now our 8 your old wheel is ready for a 12 speed 2023 wide range cassette


IMG_0583.jpeg
 

ratz

Wielder of the Rubber Mallet
So now grab a cassette lockring tool, the cassette and a torque wrench, and let's mount the cassette to the wheel.

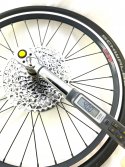
First slide the cassette on to the freehub and rotate until it drops in place. The groves on the back will line up with the teeth on the free hub. Note the threads on the free hub; those do not yet come into play. There's nothing to screw on yet.

IMG_0587.jpegIMG_0588.jpeg

Next, insert the lockring tool. This is the same tool used for years on all cassettes. There is no unique XDR tool. Rotate the lock ring with the tool using your fingers until it's finger tight; this will turn the inner cylinder of the cassette screwing it on the freehub threads. That's not how all the cassettes work; some have a simple clinching bolt for one half, and then the second part screws on this way. We'll see that in the up-and-coming V20C builds.

Lastly torque the hub to 40nm using your torque wrench. If you don't have one stop right here and go buy ones. Doing this by feel is a great way to waste more money than the cost of the torque wrench.


IMG_0590.jpegIMG_0592.jpeg
 

ratz

Wielder of the Rubber Mallet
Ok now that our wheel is ready time to give the bike some new shoes

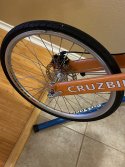
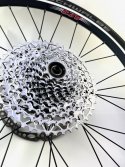
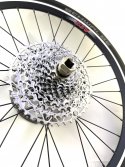
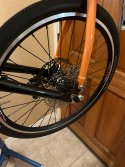
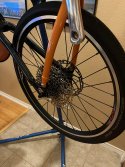
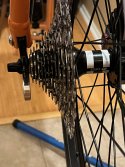
So mount the drive wheel and check the clearance. Hard to capture in the picture but it's perfect and very pretty in person; all 12 gears fit just fine.

IMG_0602.jpegIMG_0603.jpegIMG_0604.jpegIMG_0605.jpeg

For those new the forum these wheels were built for this purpose 6-7 years ago and were mounted on Quest 2.0. They were custom-built by Wheelbuilder.com on the A23 rims, and they run the only size gravel tire that fits these tiny wheels. They can still be made today if someone wanted to do this to a Q45 frame. They were meant to be a one-to-one replacement for the factory wheel because of the tiny chain stay on the folding version of these bikes. (This bike can be in a hard-side large suitcase in about 12 minutes. Those bike frames where retired when I built up two T50's. At that time I used all the parts excluding the wheels for those new builds. The old Q frame has 20k+ miles on them, I got them used so from a couple that road them all over South America. So those were recycling at the scrape yard. I have missed these bikes since I lost them; this is exciting to have back it's a blast to ride and the best way to learn Cruzbiking in my not so humble opinion. The second set of wheel got new life as well I'll post that bike at the end of this thread.

Now a word about the brakes. This gen of the bike came with AVID brakes; and I pick rotators to match the ones coming off the bike but a lot nicer quality ones from TRP these are also 6 years old and perfectly fine. Adjusting AVID brakes is the same as it's always been. Follow the procedure and your brakes will be perfect; don't and listen to them scrape and complain. Procedure is:

1. Loosen all four mounting bolts, qty 2 on the brake; qty 2 on the bracket
2. Tight the red thumb wheel pad adjuster all the way tight; and then back it off 3 click
3. With the wheel mounted squeeze the brake leveler hard, make sure it doesn't bottom out
4. If the lever bottom out adjust the cable and repeat
5. With the lever squeezed tight do three things:
5a. Release the quick release and then lock it back down to align the wheel
5b. Tighten the two bolts on the brake
5c. Tighten the two bolts on the bracket
6. Release the brake and spin the wheel; if you hear rubbing turn the big red thumb wheel counterclockwise until it stops
7. When the wheel spins silently, test the brake force
8. Adjust the cable tension until you have the correct braking force.
 

ratz

Wielder of the Rubber Mallet
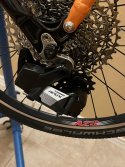
Ok, now it's time to install the shifting.

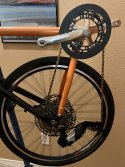
Grease up the derailleur and screw it in; Grab the 12-speed chain, install the 46T QXL ring, and test our swanky new 1x12 drive train. Simple right?
IMG_0608.jpegIMG_0609.jpeg

Errrrr nope, At some point, any build with brand new tech goes pear-shaped and biking gods saw me coming.

The time gap between the first and second photos here was 4.5 hours. Here's what I learned so you don't have to.

1. The new 12spd 1x12 stuff from SRAM doesn't like to shift without load, so it's tough to tun on the bike stand. You should set the upper and lower limits and be done. Don't waste an hour of your time like I did it will run fine. 1x12 depends on the tiny motions to get the cassette to grab the chain and then pull the derailleur into place via the chain; it's will allow that motion for 20 seconds after the shift; if it doesn't move by then it return to the previous position. On the stand without load this feel like "no shift" because the chain doesn't bite into the cassette.

2. The APEX is nice and ALOT cheaper than Eagle but has no clutch, but it does have a spring made by Demon just like Eagle to don't plan on installing your quick links while it's mounted on both the ring and the cassette you'll kill your hands

3. 1x12 uses the same chain length as normal bike size by going around both big rings just like Sheldon taught you. See:
www.sheldonbrown.com/derailer-adjustment.html#chain

If you are using an APEX 44T you have to get it perfect because of the tolerance the derailleur can't take up extra via the b-screw

4. The APEX will hit and have hard interference with the 44T no matter what you do; without a chain install you have to stay out of the first 3 derailleur positions

5. Short chain lines suck for 1x12. The angle of attack is too steep, and the chain will fall off of the front ring if it's too big due to the angle. I have a subpar chain, it's 12-speed but was also missing quick links from the package so I'm using 11sp ones. I was too cheap to buy the weird SRAM flat-top chain. (That will be here from amazon later today to correct my error.)

6. I tried to use a 46T QXL ring first from a 2x setup. Didn't work. Too big, it created a huge attack angle and lacks the special 1xN design and long teeth to handle the attack angles. Tried if forward without the bash shield. That was dumb. Tried it mounted backward was dumber, forgot about the teeth being shaped to match the orientation. Tried it normally again with the bash guard. Work until I did anything aggressive for a backspin at which time the chain would just pop off.

7. Finally settled on an inner QXL chain ring, a 36T with the bash guard, where the Stock e-ring from Cruzbike almost worked; this one actually did work. It has issues but good for a week or two.

8. I will have to repeat all these tests with the SRAM chain but for this tiny chain stay and all the different ring sizes, that means having the time to shorten the chain tested the biggest 46T ring and work down to the E-ring and finally to the 36T. I suspect having a Rotor 1x chain ring would make a big difference, but I don't have one and trying to avoid that $180.
 

ratz

Wielder of the Rubber Mallet
Quick word about the AXS system. This is the cheapest way to get a 1x12 Electric system.
The APEX XPLR is $275
The shift Pod is $150

One shift pot can work with 1 derailleur. If you wanted a 2x12 system you'd need 2 pods. That's still cheaper than a blip box and derailleurs since the Blip Box is $420 and the blips are $118 for the cabled version.

Pairing is dead simple as you can see in this video clip


ratz

Wielder of the Rubber Mallet
Ok with all that behind me I returned to my "simple" build. Really thought this was going to be about getting the photography debugged for the big upcoming builds. (yes plural) Not so much learning about 1x chain lines, chains, and ring sizes. But that's how it goes.

1. Install CrankBrothers candy pedals.
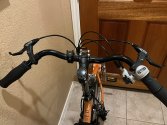
2. $10 Grips from Amazon.
3. Put Spy mirrors on
4. Put the Garmin mount and lights on

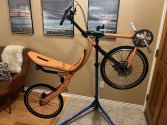
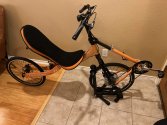
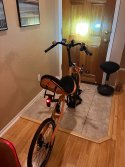
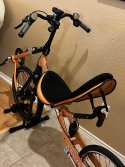
And took her out for a spin

I'll wrap the vertical brake cable to the post in a few days with cork bar tape, after I fix the way it's routed to the rear wheel with is on the wrong side of the frame.

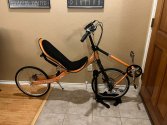
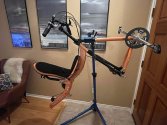
IMG_0610.jpegIMG_0612.jpegIMG_0613.jpegIMG_0614.jpeg
 

cpml123

Zen MBB Master
Ok, and then the easiest thing we are going to do that most people cringe about until they do it once..... Change the free hub.
In this case, we will remove the hyperglide hub from the DTSwiss350 and add an XDR hub to put the 12-speed cassette on.

Gently remove the QuickRelease end-cap/dust-cover to expose the bearings and spindle. I'm using a pliers with light pressure if you are worried about scratching things and rubber-coated grabber will do; the force required is very little.

View attachment 15437View attachment 15438

Remove the hub and expose the spindle and teeth of the drive gears

View attachment 15439View attachment 15440


After inspecting for wear, slide the new XDR FreeHub on to the spindle and rotate until the pawls (Those things that make the clicking sound when you coast) line up, and the hub drops down into place and then install the new dust cover


View attachment 15441View attachment 15442


And now our 8 your old wheel is ready for a 12 speed 2023 wide range cassette


View attachment 15443
Wait... what... you made it look so easy! I have DT Swiss 240 hub on my V20 front wheel. I am guessing it's pretty much the same process?!
 

ratz

Wielder of the Rubber Mallet
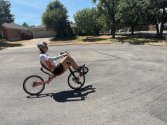
The final proof is putting a rider on the bike. Here's a third timer on an MBB; the total seat time prior to this; was about 30 minutes, primarily slow speed in the parking lot with the old dual drive install. This was learning to "clip in" day.

IMG_0615.jpegIMG_0619.jpegIMG_0620.jpeg


ratz

Wielder of the Rubber Mallet
Wait... what... you made it look so easy! I have DT Swiss 240 hub on my V20 front wheel. I am guessing it's pretty much the same process?!
Yes, it's that easy; I pretty much had your reaction the first time I did that on my kid's gravel bike a few years ago.
 

ratz

Wielder of the Rubber Mallet
6. I tried to use a 46T QXL ring first from a 2x setup. Didn't work. Too big, it created a huge attack angle and lacks the special 1xN design and long teeth to handle the attack angles. Tried if forward without the bash shield. That was dumb. Tried it mounted backward was dumber, forgot about the teeth being shaped to match the orientation. Tried it normally again with the bash guard. Work until I did anything aggressive for a backspin at which time the chain would just pop off.
Calling @Robert Holler does the graveyard have any Long chain stays laying around for a Q20 frame?
 

ratz

Wielder of the Rubber Mallet
Ok, that wraps up my testing of a build diary protocol. The lightbox seems to work well enough, and I'll definitely use lower-rez photos for the big project; these load a tad too slowly at even medium resolution. The new Apple cut just the subject from this photos, that's going to make this easier than in the past.

Time to start taking photos this week. Parts be rolling in.

I'll report back when I have the 12speed flat top chain tested. It might......be important for the other project.
 

Henri

scatter brain
Wait... what... you made it look so easy!
Aren't DT Swiss hubs well known for their very easy -even toolless?- freehub body change? I have a different brand and mine are also really easy: just one hex key in each end of the axle, screw open, pull off, push on (spin a bit to get the ratched in), screw tight. Also very convenient, if you wanna try to make the freehub louder or quiet by changing the type and amount of oil/grease. ;)
 

ratz

Wielder of the Rubber Mallet
First ride reports. She's a lot lighter and more nibble now. Acceleration is silly, and she still whips down the street at 25mph+ thanks to that 10T sprocket in spite of only having a 36T chainring on the front. I have some new bigger gravel tires en route, and the SRAM 12spd chain is here for weekend testing. Climbing gears; now have 50 rpm at the stall and fall off speed because you'd better off walking at that point.
 
Top