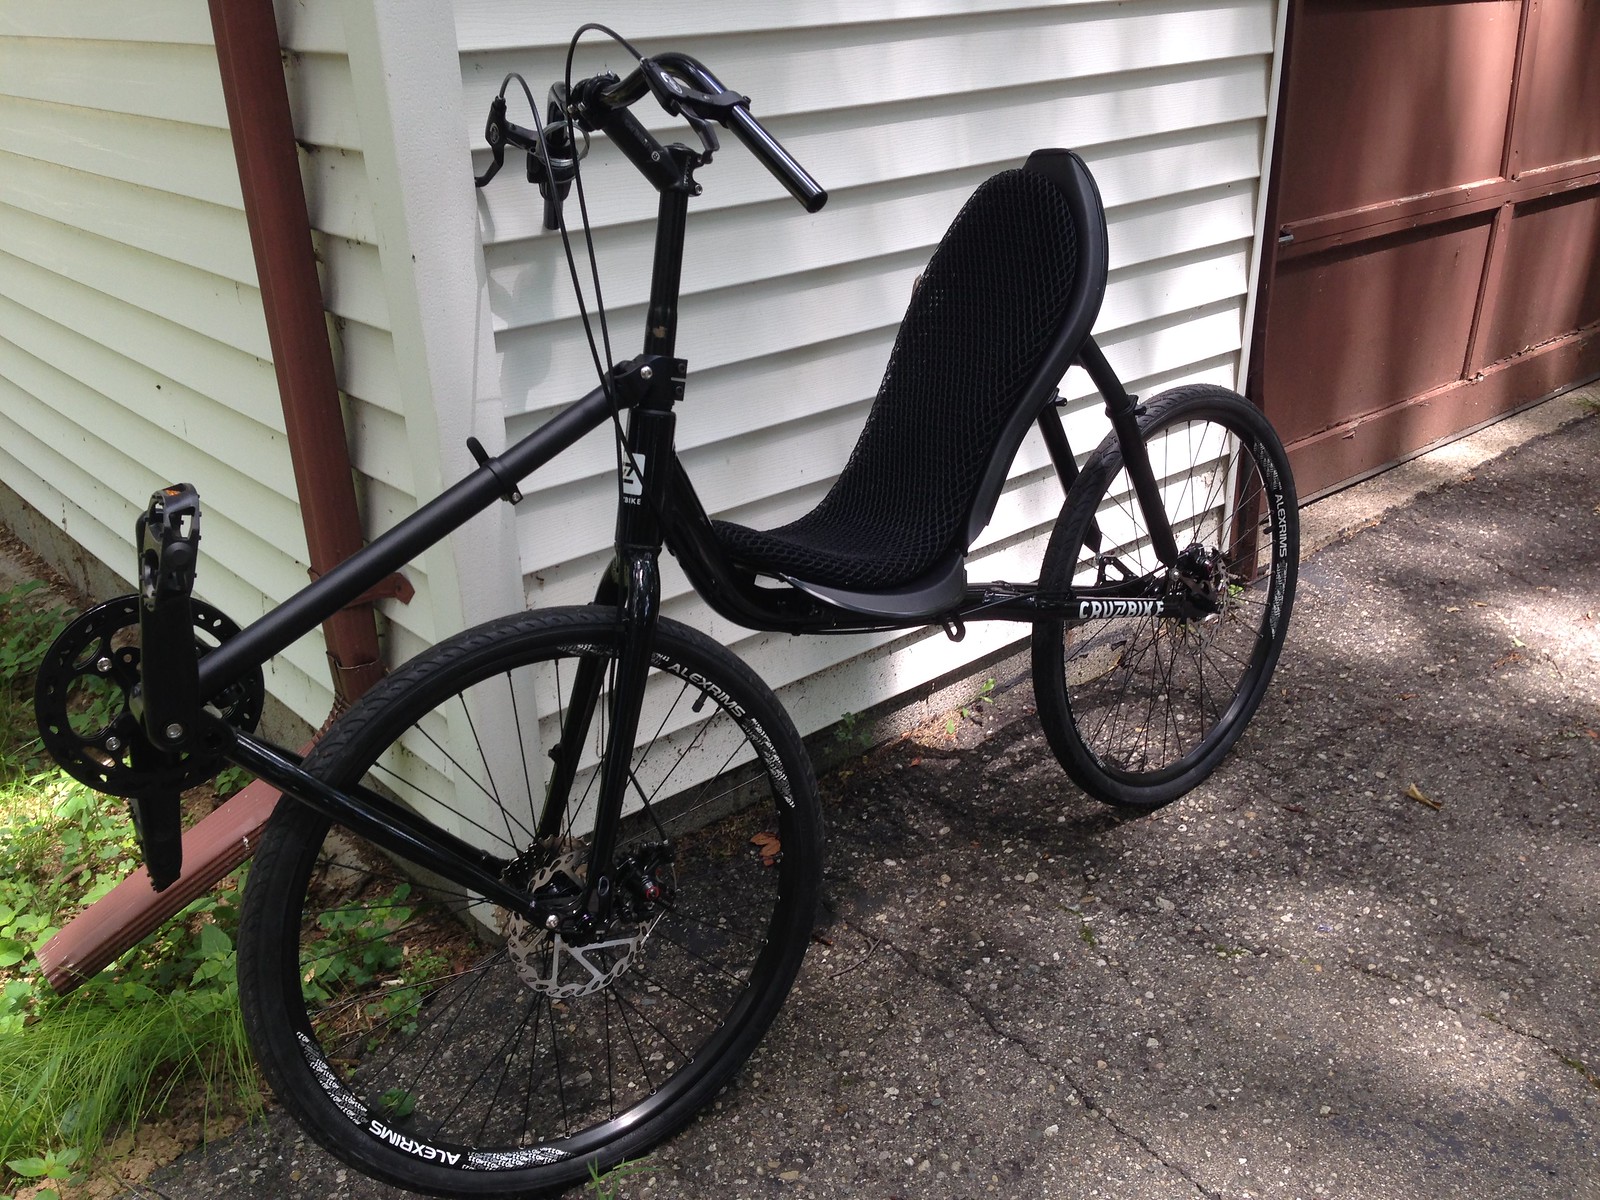
T50 - whatcha planning to build.....

anotherbrian

Active Member
I don't mind cutting down the fork steer tube but why is there a friggin star nut pounded into the end I'm supposed to cut off?

Other than the minor kerfuffle with the steer tube the frame set looks pretty good but I was surprised to see the threads on the inside of the bottom bracket shell were cut before the anodizing or whatever the coating is that was applied as all of the threads are fully coated and the threads were not chased after this frame coating was applied. This is probably good in this case as the BB mounting caps or cups screw in very easily and there is a lot more play than I would have expected. I think Cruzbike needs to tighten tolerances here. In this case it is probably a good thing the threads inside the shell got anodized or it would be even looser. I'm hoping after torqueing that this isn't going to be a problem area.

Is the star nut in the fork steerer or in the chrome mast that slides (press fits for the frameset?) over the fork steerer? I would hope that the "complete" bike had the correct length steerer tube ... if the mast length needs to be adapted then that seems reasonable (knock the star nut down if you shorten it). I received two different length masts with my frameset and they both have star nuts installed (and one included a top cap with a rubber button that goes into the hex head of the top cap bolt), and neither has any chance of coming off the fork steerer if I put them on as far as they're designed.
 

DavidJL

Well-Known Member
I like to think they put the star nut in fork steerer for when I am ready to do the QX100 steering mod. At this time I have not cut the steerer and am using the shorter of the two masts. I did need to file the area around the slot a bit to make the mast fit better, using a half-round file on the inside. Note that the seat back has holes for two water bottle cages, and another set of holes for a tire pump clip. Also, there are two holes underneath for another cage. Note sure what the hole on the top of the tube at the back is for. One thing to notice about this design is that bars can slip on the mast if pulled hard. Maybe a hole could be drilled to prevent stem rotation. I used the fork clamp from my QX100 to clamp the mast to the fork.

I just hate to cut the fork or the masts at this time. So far the BB threads are holding up. I used the BB from the QX100, a Shimano style BB. If the threads went bad, this would be a hard part to replace.
 

ratz

Wielder of the Rubber Mallet
I was surprised to see the threads on the inside of the bottom bracket shell were cut before the anodizing or whatever the coating is that was applied as all of the threads are fully coated and the threads were not chased after this frame coating was applied. This is probably good in this case as the BB mounting caps or cups screw in very easily and there is a lot more play than I would have expected. I think Cruzbike needs to tighten tolerances here. In this case it is probably a good thing the threads inside the shell got anodized or it would be even looser. I'm hoping after torqueing that this isn't going to be a problem area.

That's standard on all the bikes now (Since the Silvio 2.0). After you grease and torque it will be all good. Makes the threads stronger to boot.
 

trapdoor2

Zen MBB Master
Hmmm. Just got back from Myrtle Beach, SC vacation and this box was in the foyer...I moved it out to the "workshop".
View media item 284I need to finish the V2/k 'rebuild' before I start on the T50...but I'm probably going to open the box in a few minutes...
 

JerseyJim

Well-Known Member
I got four clear plastic washers. I was thinking they might go between the seat pan and the bracket.

I'd like to see official guidance on what that mess of bolts, washers, and nuts do. Way too many to guess (I did see on a different frameset that rubber washers were used between the seat pieces).

+1 on the guide for the bolts, especially for mounting the seat. I was surprised on the T50 assembly video that a completed seat pan just appeared without any reference to how to mount it to the bracket.

I also had to run a drill through the front seat mount tube. I thought I just got unlucky until I read someone else here had the same issue. The skewer wouldn't go straight through. I've built my own bikes before so I'm not afraid to break out the loud tools and remove metal but this may put off some folks. I'm not angry about it, I love the frameset and believe it's a good value. It's just something to look at for future runs. Cruzbike did a good job with Kickstarter and getting the product out. We just need the documentation to catch up with the hardware.

Jim
 

trapdoor2

Zen MBB Master
Ok, sports fans. I hate to tell y'all this...but somebody's paint shop is color blind.

View media item 286View media item 285
Not red. Neither is it RED. This frame is ORANGE. Really ORANGE. Like AUBURN TIGER ORANGE...or CLEMSON TIGER ORANGE...or TENNESSEE VOLUNTEER ORANGE. Oh the humanity! I'm an Alabama "Crimson Tide" fan... :confused:
Miz Diane is a color sensitive (whereas I am not). She sez: "Wow, that's a very pretty ORANGE." Nope, not a hint of red.


I agree, a very pretty color. Maybe I need to add some tiger stripes...
 

trapdoor2

Zen MBB Master
Couldn't stand it...
View media item 287Sitting on an old set of 27" tires/wheels. Not sure if the front would fit if it were pumped up...very little clearance there (not made for that wheel size. Duh!). There is a huge amount of room in the rear though. Now I'm wondering about Big 'n' Littles. "29'r" fatboy in the rear and then std. fat (2+" x 26") up front. Now I gotta go steal the 26" fat tires off my 3sp V2/k...

Ok...an hour or so later...

26" tires off the cruzer (Schwalbe "Big Apple" tires) fit fine. Plenty of clearance, etc. You could go quite a bit wider than the 2.1" BAs. Just for fun, I put my 700c front end from my 'daily driver' V2/k on. No fit issues...currently wearing a set of Vittorio Rubino 700X28 tires. I had to give the old 27's a try, so I pumped them up. Fit in rear is no trouble (as expected). Front would need about 1mm shaved off the fork underneath the crown (which would not compromise the strength of the fork at all). Of course, seat height is affected by the larger tires. Those with short legs might be uncomfortable, etc., etc.

I can easily see where the rear stays could be modified (hacksaw, file, done) to allow a more laid back seat angle. This is definitely a hot-rodder's dream bike.
 
Last edited:

Rampa

Guru
This bike is just screaming for a Silvio/Vendeatta front-end! That would give tire clearance and an adjustable seat, high-performance bike.
 

DavidCH

In thought; expanding the paradigm of traversity
This bike is just screaming for a Silvio/Vendeatta front end.
If you want one of those bad enough it will materialize in front of you.

I think the T50 is great to tinker with and learn on. Once smitten.... then you pay the big bucks for the adrenalin rush.

I remember how excited I was about my cruzbike conversion bike. The local bike shop guy said "It's just a whim". For me it's more than that... it's an experience. If you want the total experience then you buy a V.

It's been just so hot here. On the V you can go so much faster and with the wind coming over you and cooling you down for less watts, excellent.

It was brilliant today even if it was 6:45am.
 

Eric Winn

Zen MBB Master
Got one of two bikes assembled except for the chain and derailleur. Chain has been ultrasonically cleaned and is about to get a bath in hot wax. Robert told me he would send me the missing derailleurs tomorrow.

Had fun rolling down my driveway and even more fun rolling down the neighbor's driveway. Theirs is higher and steeper so you roll faster and farther. :eek:

I'm liking these Clarks CMD-17 disc brakes. Easy to install and adjust.

Here is Clarks reference for pads for the CMD-17: http://www.clarkscyclesystems.com/p...isk-pads/id-8389c.html?atrr_diskpad_style=620

My Google-foo yielded these sources:
http://www.industrialbicycles.com/store/p/3122-CLARKS-VX839C.aspx
http://www.ebay.com/itm/Clarks-VX83...326165&hash=item41c6f49eb4:g:~OIAAOSwfpVZNXx8
https://www.walmart.com/ip/Clarks-B...4598&wl11=online&wl12=182533949&wl13=&veh=sem
https://smile.amazon.com/Organic-Se...=8-1-spons&keywords=avid+bb5+brake+pads&psc=1

Apparently these are the same pads used in avid BB5. Anyone have a preferred source for replacement pads?

This is going to be a fun bike when I can pedal it. o_O

35433539660_524ad80350_h.jpg
 

Cruzbike Chris

Well-Known Member
So for you, that are already done with your build, A couple of quick questions
1. where did you put the 4 rubber grommets
2. and 2 clear plastic washers?
3. how far down the steering tube should the extension riser go?

From Robert:
The grommets are for the holes where the seat base and the seat top attach.
The clear washers are for between the set base and top (there are two extras)

Robert

I also had to run a drill through the front seat mount tube. I thought I just got unlucky until I read someone else here had the same issue. The skewer wouldn't go straight through.

So guess I need to get my drill out too, skewer won't fit. Maybe this helps the next run buys!
 
My idea of scavenging parts from a 30 year old mountain bike seems to be a bust so I am buying components to complete the build. Any recommendations for a manufacture/model bottom bracket?
 

Brad R

Well-Known Member
I got mine together.

Practiced in the driveway yesterday evening and this morning.

Went to my local high school and practiced about 5 miles worth this afternoon.

I am starting to feel comfortable.

It took a while to get the body position and angle of bike in corners just right so that I wasn't trying to do all the work with my hands and arms.

I had a big grin on my face as the stress left my hands and the bike started to go where I wanted it to go.


38Q703
https://www.flickr.com/photos/135435293@N08/shares/38Q703


How do I get the images directly in the post?
 

Brad R

Well-Known Member
My idea of scavenging parts from a 30 year old mountain bike seems to be a bust so I am buying components to complete the build. Any recommendations for a manufacture/model bottom bracket?

I built mine with a 1x11. Jenson had a good deal on the old style Race Face Atlas crankset. It came with an external bottom bracket and went on easily.
 

trapdoor2

Zen MBB Master
I knew the rubber grommets were for the two seat halves, no question there...same as the V2/k. I deduced that the clear washers were for the seat stay mount. I received 4 grommets and 3 clear washers.

My seat skewers went in perfectly. Assembly was a piece of cake. The seat bottom does not have enough rearward adjustment for my fat butt. I need to lose those 20lbs I gained since Jan.

I took a shot of the 700c X 28 wheelset clearance. About 5-6mm gap to the fork crown.
View media item 288I'm sticking with 26" tires but it is good to know that 700c will fit nicely.
 

trapdoor2

Zen MBB Master
How do I get the images directly in the post?
If you have external hosting, you can link directly to the URL where the photo is posted by using the "image" button (next to the smiley face). If you have the pix on your computer or elsewhere, you can also create a 'media album' here on your personal page and then use the camera icon to insert them (as I have been doing). You have to upload 'media' into your 'album'.
 
Top