Q ring upgrade - Ahhhhhhhhhhhhh......

Lief

Guru Schmuru
That's a bunch easier

John,
it's funny - I could have read that last week and I'm not sure it would have helped - but now, having done it, it makes PERFECT sense.
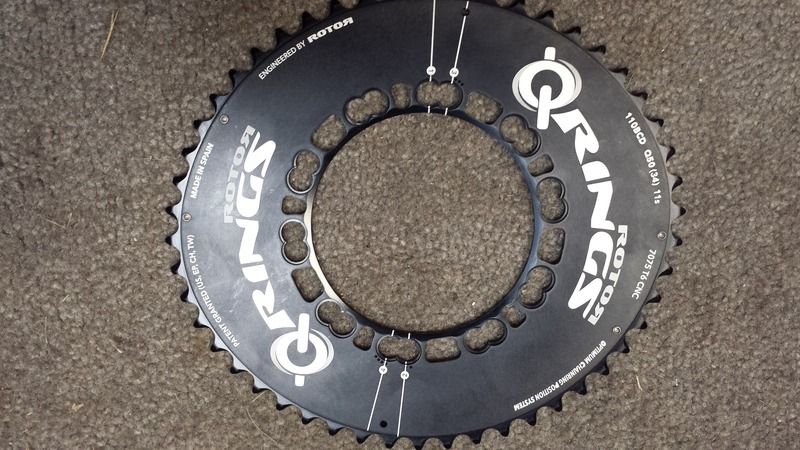
Not sure why I was so scared of the QRing thing - anything that feels like magic does that to a person I guess.
Maybe I'm more susceptible than most.

Ratz,
I was able to loosen the bolt just fine when I took it apart.
getting it back together again was the PITA. I ended up wedging (loosely) a small allen wrench between the crank and the chainring bolt just to hold it in place enough to get the inside bolt seated and torqued enough.

Again - having done it now, I can totally see what you are talking about RE: the short hex bit and pliers on the inside.
I was sure wishing that the crank and the "OCP" spider arm were in opposition that night.

I greased the screw(s).
I torqued them fairly close (I think). I've over-torqued things my whole life (to the point of failure) - I have an entire section on my blog called "Things I Have Broken".
Since I didn't have the right torque wrench setup, and being sensitive to my propensity for overtorquing, I undertook this very scientific method:
* I looked at the spec for the torque
* Practiced on my existing torque wrench for the proper feel of spec
* Grabbed an allen wrench that wasn't the same length as my torque wrench
* And tightened those bolts until they were right up to the place where I'd typically put in that extra, just for good measure, 1/4 turn, beyond what I just felt on the different length torque wrench.
* And I stopped before doing that last 1/4 turn.
* Put the wrench down and backed slowly away.

all that is to say - it's time to invest (some more) in some proper tools. :)

Lief
 

ratz

Wielder of the Rubber Mallet
They makes special tools for you

Lief

That's hilareous....

We have special rules for guys like you .... You need one of these 5nm torque wrenchs in your tool box. All cables and non load bolts are usually around 5nm so these work great; and it's cheap. Until you get a big fancy torque wrench; get a set of Long arm allen wrenches. When the metal of the long arm of the wrench starts to bend; if you used grease, then you are probably at the correct torque 95% of the time.

Guys who over torque keep spare bolts in the drawer; those of use that under torque carry spare bolts on the bike. Break'em or Lose them; pick your poison.....


Robert Holler

Administrator
Staff member
Just returned from Cycle

Just returned from Cycle Oregon - this year the ride was a total of 35,000 plus feet of elevation. Lots of climbs in the 7+ % range. The Q ring was simply awesome on the V.

Robert
 

LarryOz

Cruzeum Curator & Sigma Wrangler
If you send me a set (52/24),

If you send me a set (52/24), I try them on the V and let you know the results! :)
 

ratz

Wielder of the Rubber Mallet
Testing OCP Positions on the mag trainer

So coming back to this discussion.

Before It got cold I managed to log 800 miles on the Q-rings in the default OCP 2 position as documented in post 15 and 36. So at this point I think I have a good feel for the pedal stroke on the road. Now that it's indoor season; I've had the Vendetta up on the mag trainer for maintenance enough to re-consider the ring orientation.

There was nothing wrong with OCP 2 out on the road, it rode good, but it feels a little "bouncy" on the trainer. You can't hide from a sloppy pedal stroke on the trainer. So one of the goals for the winter was to even out the pedal stoke. With that in mind I moved the ring to OCP 3 and I'm trying that out. Per the docs
The rules with which you must work to optimize your setup are:

• A higher OCP regulation number is better for acceleration, and a lower regulation number should give a slightly higher top speed.

• If you would like to be able to transfer power earlier in the stroke or get a feeling of more resistance (often for mashers), rotate the chainring to a lower OCP number.

• If you would like to transfer power later on in the stroke or have the feeling of less resistance, rotate the chainring to a higher OCP number.

My fore-brain says that I want MORE POWER sooner big-leg push; He-Man on trainer grunt grunt and all that; but my analytical side is noting yo-dude you are bouncing so much you are going to pop the bike off the mount and crash into the wall.

So OCP3 it is for some testing......


So low and behold, It spins better/smoother in that position and I really don't feel a drop off in top end power. I can still mash at the pedal but the cadence is a little higher. Acceleration is hard to gage stationary, but spin-up feels more nimble. Then again I'm not sure i have ever said to myself; "if only this bike accelerated faster".....

I'll try this for a while;

I need to double back and look at the Silvios next, both now have Q-rings but they both have 55-60mm extensions; so I set mine to OCP 3 since it's a Vendetta like boom angle now. I also completely forgot to look at Mrs Ratz setup; she was in OCP 4 and I can probably back it also off to OCP3. Tweaking her setup is better for objective feedback she does not care about the details and gives a good honest "that better, that's worse" evaluation.


ratz

Wielder of the Rubber Mallet
More Testing

After month, I have now onto OCD 4; that made a nice jump in maintainable cadence. Going round at 90-100rpm now withouth any problem. Going to give the a go for another 30 days and then if it's still good and no appreciable power lost, I'll move on to OCD5. Right now my knees really like the change; and the acceleration is nice.
 

Rick Youngblood

CarbonCraft Master
Hey Bob, can you upload an

Hey Bob, can you upload an image so we can have a reference to your/my original position?

I like the sound of knees like it better.
 

ratz

Wielder of the Rubber Mallet
Qring change photo

Updated Photo.

Ok here you go but it doesn't look like much.

As you know Each time you move 1 position on the Aero 110 BCD ring, you actually invert the ring. So when I was test #3 the ring was flipped 180 degrees with position #3 at the arrow, now it's flipped back and #4 is on the OCP bolt. While it seems like an "nothing offset" it does allow me to ride at a much higher cadence; there's plenty of top end to surrender so I don't feel any loss from the change in early power on set. If this is good after 30 days; I'll flip it again to position #5

I'm tracking this with the power meter; to make sure the higher cadence + changes to the rings gives me a higher gross power output versus perceived effort.

Qringupdate(1).jpg
 

Rick Youngblood

CarbonCraft Master
Ahh...okay, so that's one

Ahh...okay, so that's one hole rotated counter clockwise from your original photo. I'm going to try that tomorrow as I'm always looking to help my knee(s). Because I'm not running a power meter to gather data, I may have a hard time feeling any difference with just one ride, it may take many rides for me to determine a difference. But you never know!
 

BentAero

Well-Known Member
For the sake of conversation, let's assume for a minute that I'm even more dense than usual.
I finally opened the Q-ring packages that have been in the garage for months and tried to engage the brain for an install.

Uhhh...

A) My rings don't match the instructions.
B) My light bulb is apparently burned out.

The instructions show 35 holes with 5 ocp positions, back it up 17 holes, divide by 6, carry the 3, add 12, subtract yellow, blah, blah, blah. (Odd number of holes)

Both my rings have only 20 holes, 4 ocp positions. (Even number of holes)

Am I over-thinking this, because I'm not getting it...
Did I get cheated? I want all of my 35 holes so I can ride like Larry. ;(

20150526_211729_zpsmksm061r.jpg


upload_2015-5-26_22-13-8.png
 
Last edited:

ratz

Wielder of the Rubber Mallet
Gary,

Assuming your crank are still those apex/rivals in your photos.

1) Put crank in position with right pedal at the dead spot.
2) Align the crank bolt that leads your crank arm (see big read arrow in my photo) with the hole mark #2.
3) Review the point that the chain engages the first tooth on the top of the ring as it leave the front derailleur.
4) Rotate the ring for or back while leaving the crank stationary so that the line at "1" is the tooth that is first engaging.
5) Whatever hole is now on the bolt that leads the cranks is your personal "OCP 2" in most cases on a vendetta it's going to be the existing #2 or vary close.
6) If it's not #2 you can if you want calculate which wholes are #1, 3,4,5 for your setup.

That's all. Should take you about 5 minutes

If you are like several of us you'll probably like OCP4 the best, as it gives use watt wimps great accelerations.
 

castlerobber

Zen MBB Master
Uhhh...

A) My rings don't match the instructions.
B) My light bulb is apparently burned out.

The instructions show 35 holes with 5 ocp positions, back it up 17 holes, divide by 6, carry the 3, add 12, subtract yellow, blah, blah, blah. (Odd number of holes)

Both my rings have only 20 holes, 4 ocp positions. (Even number of holes)

Am I over-thinking this, because I'm not getting it...

Good, I wasn't the only one that ran into this when installing the 50T aero. :confused:

I made it come out to 35 holes for the sake of figuring out the OCP points by counting the larger ...trapezoids?... as two holes, and the smaller ones as one hole. Once I got the ring oriented, the spider arms all fell at "real" bolt holes, so it wasn't a problem. I'm sure there's a perfectly good reason for the non-round openings, I just don't know what it is yet. Hoping for words of wisdom from our Q-ring experts.
 

ratz

Wielder of the Rubber Mallet
I'm sure there's a perfectly good reason for the non-round openings, I just don't know what it is yet. Hoping for words of wisdom from our Q-ring experts.

On 110BCD they can't use full holes and get alignment you guys both fell victum to the 130BCD instructions. The aero ring is 110 BCD. I called support and got the 110 BCD instructions. :mad:

But my 6 steps are faster :cool:
 

castlerobber

Zen MBB Master
On 110BCD they can't use full holes and get alignment you guys both fell victum to the 130BCD instructions. The aero ring is 110 BCD. I called support and got the 110 BCD instructions. :mad:

But my 6 steps are faster :cool:
Ah, that makes sense. Could you share the 110BCD instructions, just for purposes of edification?

Your steps definitely look faster. I've been rereading the major threads here on Q-ring orientation, and I'm getting closer to grokking it. My Q-rings are pretty close--I've installed 130BCD rings on a road bike and a tadpole trike, so I have an idea what they should feel like--but I probably need to rotate them one hole. The pedal stroke feels a little lumpy when I'm in one of the two or three smallest cogs and the 50T ring.
 

ratz

Wielder of the Rubber Mallet
Sorry bad wording I got verbal instruction on the phone. The recumbent instructions predate the surge in 110bcd popularity. The hole counting really was an over explanation. Also note These days OCP 3 is generally considered the DF default. These days. They use to say OCP2.

all that matters is that for setup, get line "1" on the first tooth of engagement with pedal in dead spot, and then locate a bolt that lines up with a factory notched number to be a reference point. If the factory numbers don't hit a bolt then you half to count to figure out you relative offset, so you can shift the factory marks. On a 110 it will just work even with the fewer holes.

See this doc which shows the ring difference at different bcds
http://www.rotorbikeusa.com/pdf/q-ring user manual_all models.pdf

I recommend OCP 4 on the vendetta because the V really seems to encourage massing and OCP 4 counters that effect

This video is helpful too.

Notice he says you can run them out of phase. While that is true if you run a really wide gap on the rings 52/34 you may not get good shifting out of phase, and the CB Derailler steam will make tuning the dérailleur hard, so better to stay in phase IMHO. Personally I'd love to run OCP 1 on big ring and OCP 4 on little, but the shifting is awful. So I ride OCP 4 and spin

Or use my six steps if you have a sram style five bolt crank.
 

JOSEPHWEISSERT

Zen MBB Master
Gary,

Assuming your crank are still those apex/rivals in your photos.

1) Put crank in position with right pedal at the dead spot.
2) Align the crank bolt that leads your crank arm (see big read arrow in my photo) with the hole mark #2.
3) Review the point that the chain engages the first tooth on the top of the ring as it leave the front derailleur.
4) Rotate the ring for or back while leaving the crank stationary so that the line at "1" is the tooth that is first engaging.
5) Whatever hole is now on the bolt that leads the cranks is your personal "OCP 2" in most cases on a vendetta it's going to be the existing #2 or vary close.
6) If it's not #2 you can if you want calculate which wholes are #1, 3,4,5 for your setup.

That's all. Should take you about 5 minutes

If you are like several of us you'll probably like OCP4 the best, as it gives use watt wimps great accelerations.
I noticed that the first engaged tooth changes on the big Q-ring depending on which cassette gear the chain is currently on. This is because the angle of the chain changes when a different cassette gear is used even though the cranks stay in the same dead spot position. So, which cassette gear should be used when tuning the big Q-ring?
 

ratz

Wielder of the Rubber Mallet
Ah that's a good point. I use 17t for that since it's the most common center point on all cassettes. The head math tell me you can bias the system to your liking by changing that cog. If you set it while in the biggest cassette positions. you are going to delay the power stroke; if you put it in the smallest cassette position you will move the power stroke earlier. Given what a recumbent already does to knees I would suggest that 17T-32T would be the safest range to use. Setting it based on 11T might not be very knee friendly.
 

JOSEPHWEISSERT

Zen MBB Master
Ah that's a good point. I use 17t for that since it's the most common center point on all cassettes. The head math tell me you can bias the system to your liking by changing that cog. If you set it while in the biggest cassette positions. you are going to delay the power stroke; if you put it in the smallest cassette position you will move the power stroke earlier. Given what a recumbent already does to knees I would suggest that 17T-32T would be the safest range to use. Setting it based on 11T might not be very knee friendly.
Thanks, that's good to know. I set mine somewhere in the middle, but I don't remember which cog. That's good for everyone to know because I wondered what was going on at first until I realized what was happening with the chain angle.
 

Robert Holler

Administrator
Staff member
all that matters is that for setup, get line "1" on the first tooth of engagement with pedal in dead spot, and then locate a bolt that lines up with a factory notched number to be a reference point. If the factory numbers don't hit a bolt then you half to count to figure out you relative offset, so you can shift the factory marks. On a 110 it will just work even with the fewer holes.

This is key and should get you very close. It takes a while to really dial in Q's so they are right. It took me about a full season of default riding and trying a few holes before and after.
 
Top